Kali Linux Installation Methods
Kali Linux can be installed using the following methods:Ways to Run Kali Linux:
- Directly on a PC, Laptop – Utilizing a Kali ISO image, Kali Linux can be installed directly onto a PC or Laptop. This method is best if you have a spare PC and are familiar with Kali Linux. Also, if you plan or doing any access point testing, installing Kali Linux directly onto Wi-Fi enabled laptop is recommended.
- Virtualized (VMware, Hyper-V, Oracle VirtualBox, Citrix) – Kali Linux supports most known hypervisors and can be easily into the most popular ones. Pre-configured images are available for download from www.kali.org, or an ISO can be used to install the operating system into the preferred hypervisor manually.
- Cloud (Amazon AWS, Microsoft Azure) – Given the popularity of Kali Linux, both AWS and Azure provide images for Kali Linux.
- USB Boot Disc – Utilizing Kali Linux's ISO, a boot disc can be created to either run Kali Linux on a machine without actually installing it or for Forensic purposes.
- Windows 10 (App) – Kali Linux can now natively run on Windows 10, via the Command Line. Not all features work yet as this is still in beta mode.
- Mac (Dual or Single boot) – Kali Linux can be installed on Mac, as a secondary operating system or as the primary. Parallels or Mac's boot functionality can be utilized to configure this setup.
Install Kali Linux using Virtual Box
The easiest method and arguably the most widely used is installing Kali Linux and running it from Oracle's VirtualBox.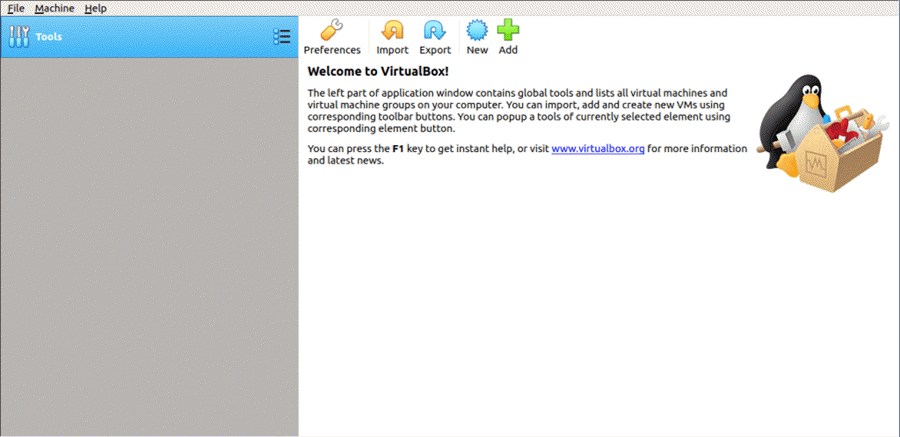
Step 1) Go to https://images.offensive-security.com/virtual-images/kali-linux-2018.4-vm-amd64.7z
This will download an OVA image, which can be imported into VirtualBox
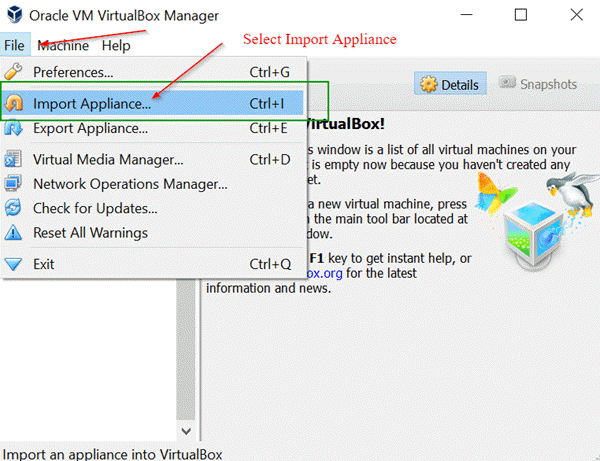
Step 2) Open the Oracle VirtualBox Application, and from the File, Menu select Import Appliance
File Menu -> Import Appliance
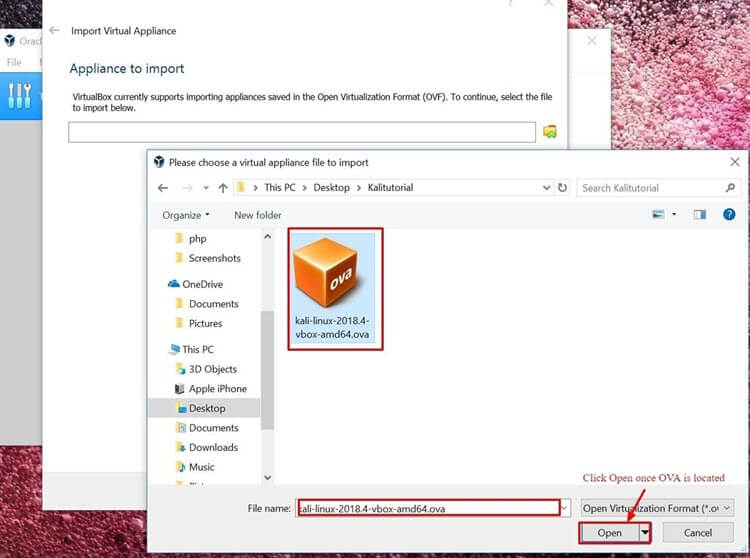
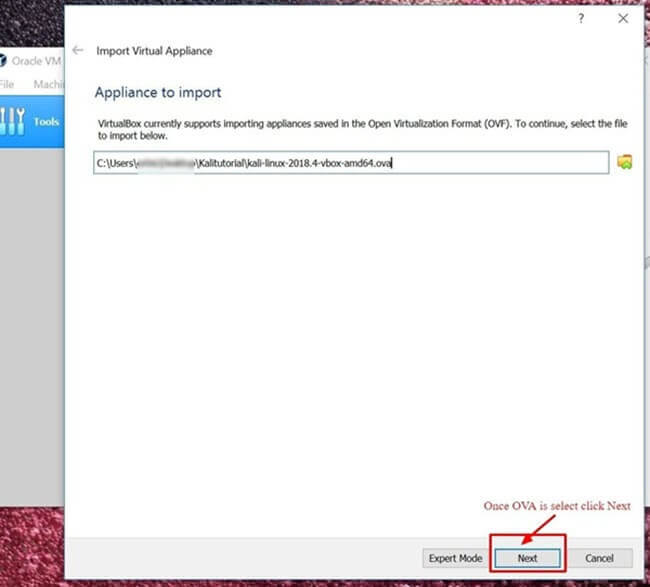
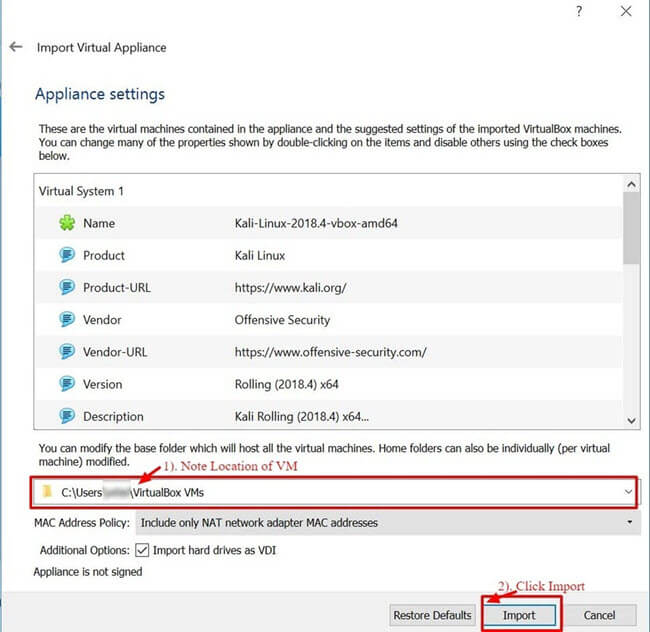
Step 7) Congratulations, Kali Linux has been successfully installed on VirtualBox. You should now see the Kali Linux VM in the VirtualBox Console. Next, we'll take a look at Kali Linux and some initial steps to perform.
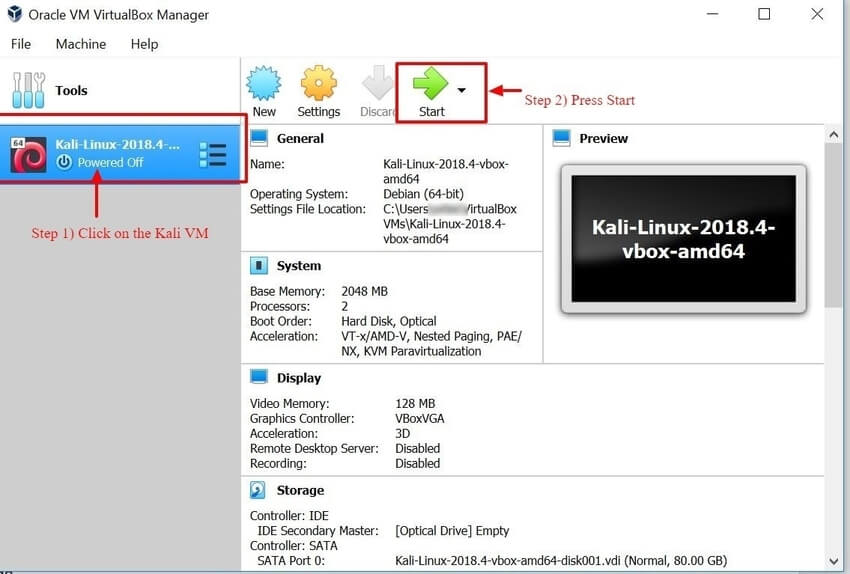
Step 8) Click on the Kali Linux VM within the VirtualBox Dashboard and click Start, this will boot up the Kali Linux Operating System.
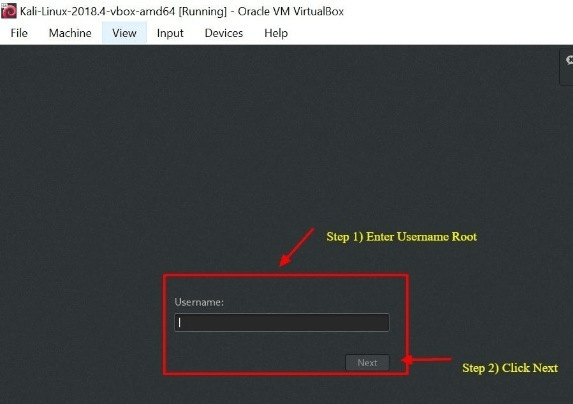
Step 9) On the login screen, enter "Root" as the username and click Next.
Step 10) As mentioned earlier, enter "toor" as the password and click SignIn.
You will now be present with the Kali Linux GUI Desktop. Congratulations you have successfully logged into Kali Linux.
Getting Started with Kali Linux GUI
The Kali Desktop has a few tabs you should initially make a note of and become familiar with. Applications Tab, Places Tab, and the Kali Linux Dock.Applications Tab – Provides a Graphical Dropdown List of all the applications and tools pre-installed on Kali Linux. Reviewing the Applications Tab is a great way to become familiar with the featured enriched Kali Linux Operating System. Two applications we'll discuss in this tutorial are Nmap and Metasploit. The applications are placed into different categories which makes searching for an application much easier.
Accessing Applications
Step 1) Click on Applications Tab
Step 3) Click on the Application you would like to start.
Places Tab – Similar to any other GUI Operating System, such as Windows or Mac, easy access to your Folders, Pictures and My Documents is an essential component. Places on Kali Linux provides that accessibility that is vital to any Operating System. By default, the Places menu has the following tabs, Home, Desktop, Documents, Downloads, Music, Pictures, Videos, Computer and Browse Network.
Accessing Places
Step 1) Click on the Places Tab
Step 2) Select the location you would like to access.
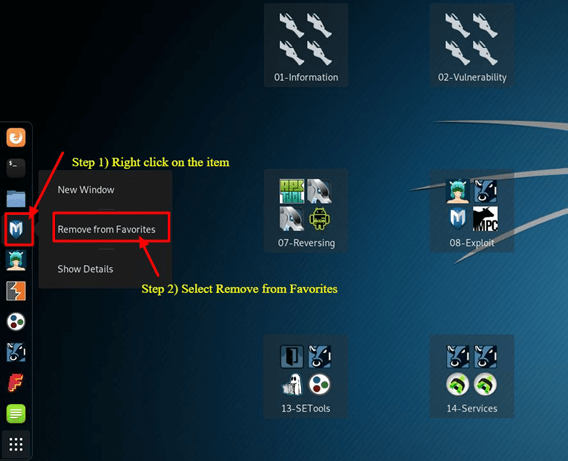
Kali Linux Dock – Similar to Apple Mac's Dock or Microsoft Windows Task Bar, the Kali Linux Dock provides quick access to frequently used / favorite applications. Applications can be added or removed easily.
To Remove an Item from the Dock
Step 1) Right-Click on the Dock Item
Step 2) Select Remove From Favorites
To Add Item to Dock
Adding an item to the Dock is very similar to removing an item from the Dock
Step 1) Click on the Show Applications button at the bottom of the Dock
Step 2) Right Click on Application
Step 3) Select Add to Favorites
Once completed the item will be displayed within the Dock
Kali Linux has many other unique features, which makes this Operating System the primary choice by Security Engineers and Hackers alike. Unfortunately, covering them all is not possible within this tutorial; however, you should feel free to explore the different buttons displayed on the desktop.


